Active Directory (AD) is a core component of Microsoft services. AD helps implement efficient management and perform batch operations, such as managing accounts and computers, deploying applications, updating patches, and managing access to files and resources. AD domains are required by many Microsoft components, such as Exchange and failover clusters. This topic describes how to build an AD domain and join a client to the AD domain. In the example, Elastic Compute Service (ECS) instances that run Windows Server 2016 Datacenter are used.
Prerequisites
Two ECS instances are created. For information about how to create an ECS instance, see Create an instance on the Custom Launch tab. The ECS instances meet the following requirements:
The partitions on disks of the ECS instances are Windows NT file system (NTFS) partitions.
The ECS instances support the domain name system (DNS) service.
The ECS instances support TCP/IP protocols.
In this topic, two ECS instances that run Windows Server 2016 Datacenter are used as an AD domain controller and an AD domain client.
Networking information: The ECS instances are deployed in a virtual private cloud (VPC) and connected to a vSwitch that is associated with the CIDR block 172.31.0.0/16.
Domain information: The domain name example.com is used. The IP address 172.31.106.88 is assigned to the ECS instance that is used as an AD domain controller. The IP address 172.31.106.87 is assigned to the ECS instance that is used as an AD domain client.
ImportantWhen you build an AD domain, make sure that the IP address of each ECS instance remains unchanged to ensure normal access to the instance.
Step 1: Deploy an AD domain controller
We recommend that you do not deploy an AD domain controller by performing the following operations: create a custom image from an ECS instance to which an AD domain controller is deployed, and then create a new ECS instance to which an AD domain controller is deployed from the custom image. If you perform the preceding operations to deploy an AD domain controller, specify the hostname of the original instance for the new instance during instance creation. Alternatively, change the hostname of the new instance to the hostname of the original instance after you create the new instance.
Connect to the ECS instance that you want to use as an AD domain controller.
Start Server Manager.
In the lower-left corner of the desktop, click the
 icon, enter
 Server Managerin the search box, and then click Server Manager in the search results.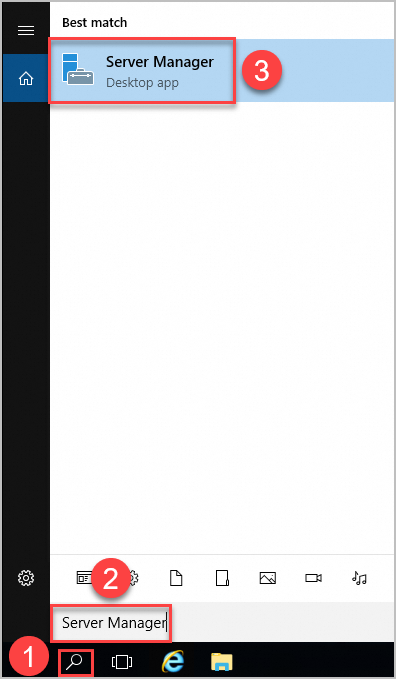
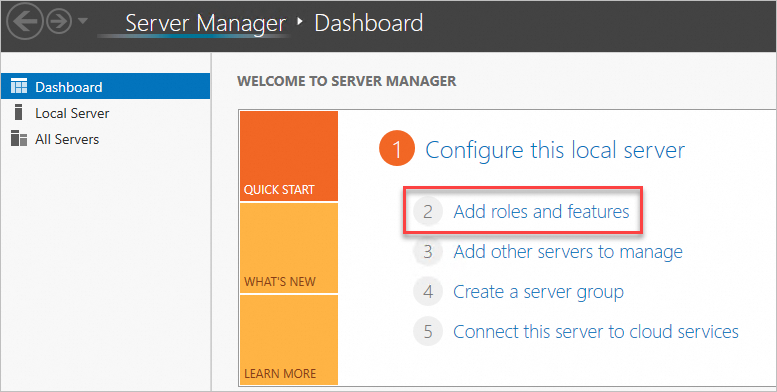
In the Server Manager window, add roles and features.
In this example, the AD and DNS services are deployed on the same server. Perform the following steps.
ImportantSpecific steps are not described in this section. When you perform the steps that are not described in this section, use the default settings and click Next.
Click Add roles and features.
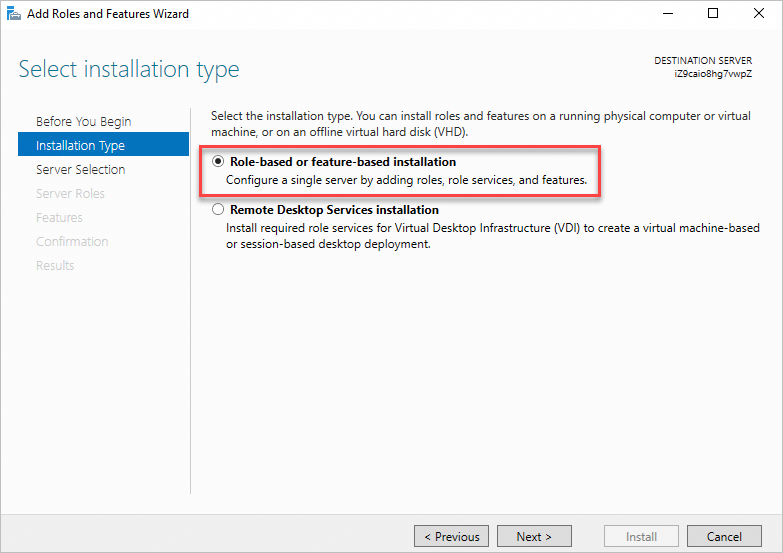
Select an installation type.
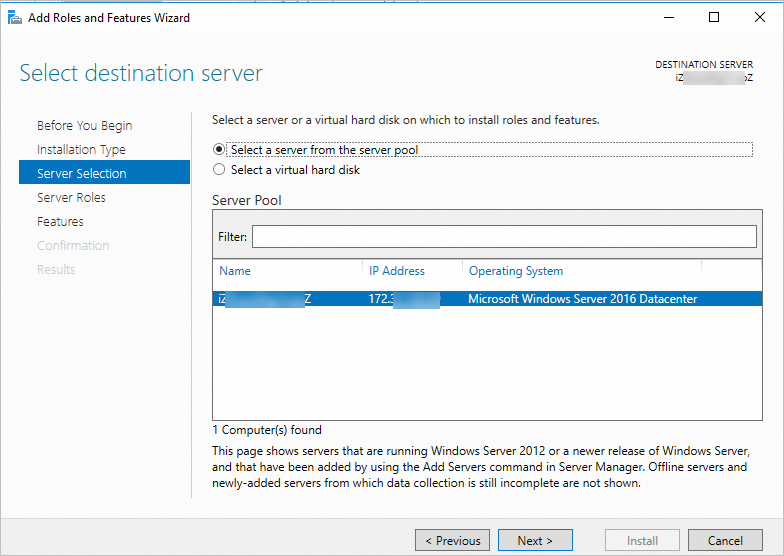
Select the server on which you want to install roles and features.
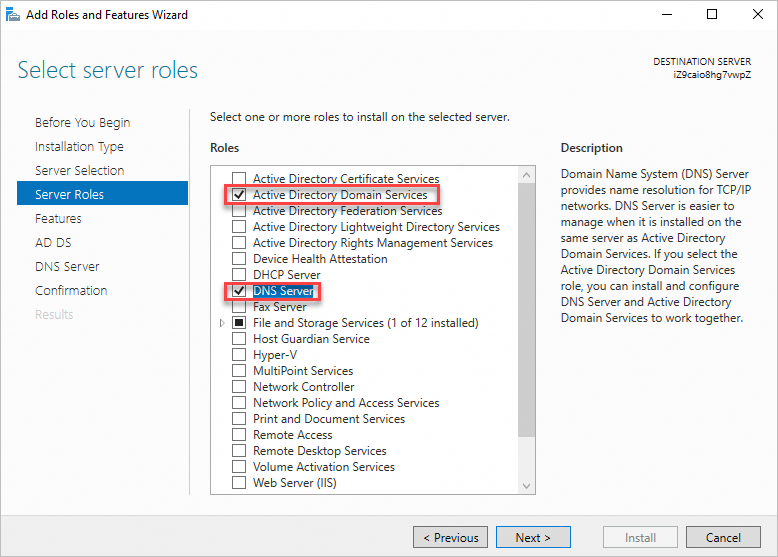
In the role list, select Active Directory Domain Services and DNS Server.
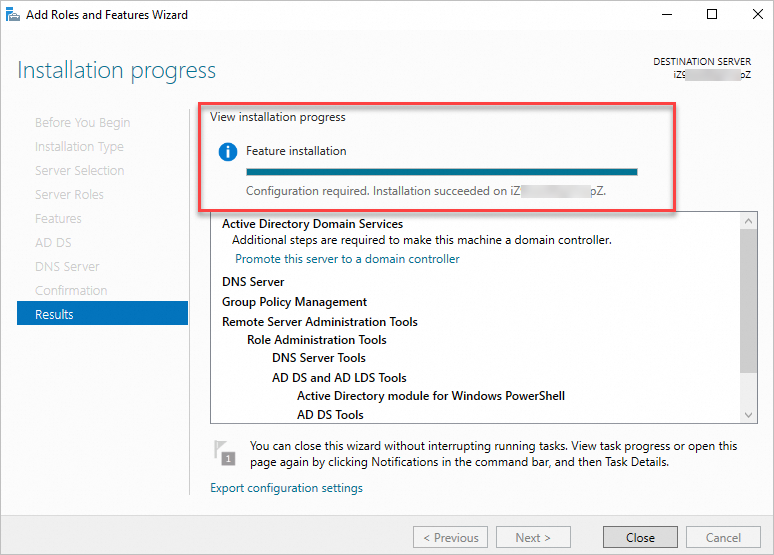
After the installation is complete, click Close.
Configure the ECS instance as an AD domain controller.
ImportantSpecific steps are not described in this section. When you perform the steps that are not described in this section, use the default settings and click Next.
In the upper-right corner of the Server Manager window, click the
 icon and select Promote this server to a domain controller.
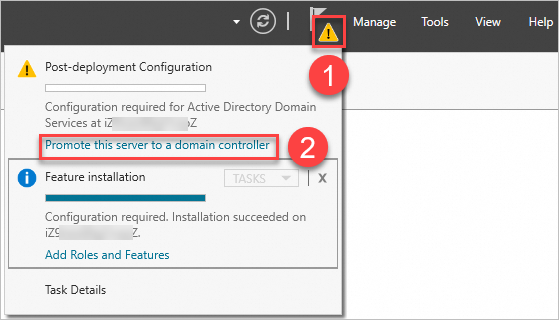
In the Active Directory Domain Services Configuration Wizard, set the Select deployment operation parameter to Add a new forest and enter a domain name in the Root domain name field.
In this example,
example.comis entered in the field.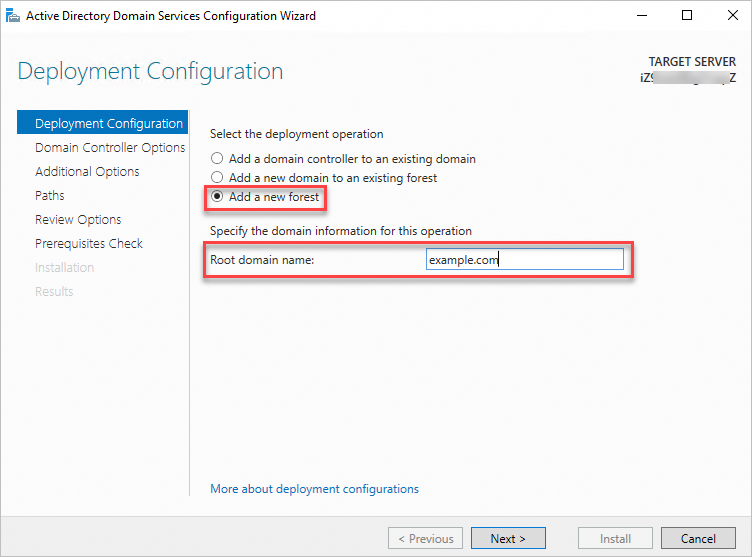
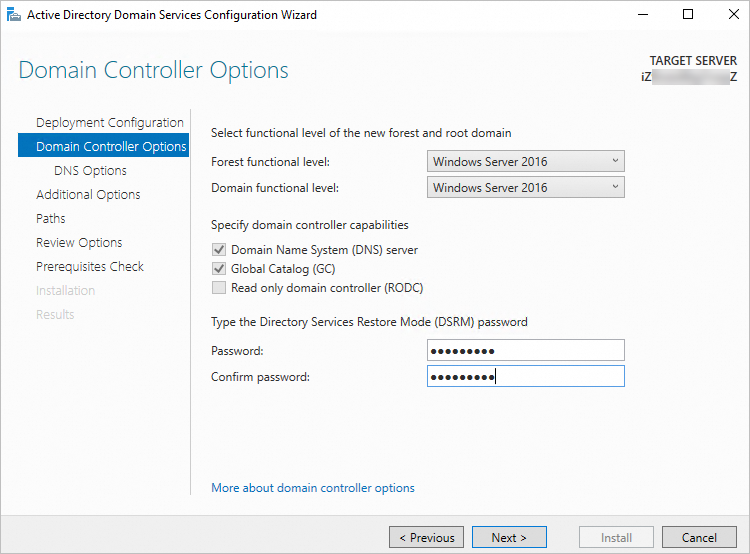
Configure the domain controller options and click Next.
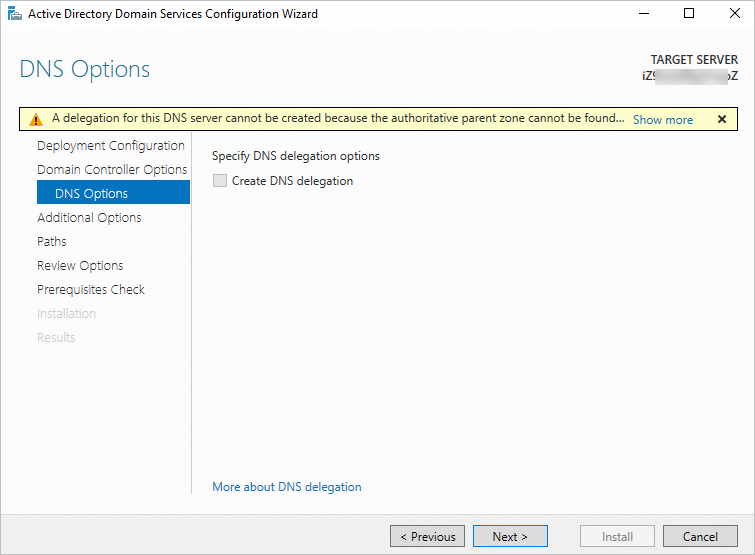
Configure the DNS options and click Next.
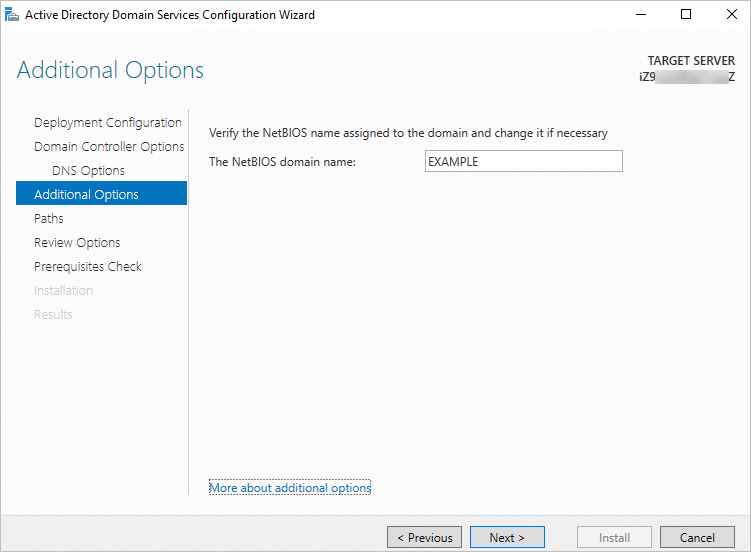
Configure the NetBIOS domain name and click Next.
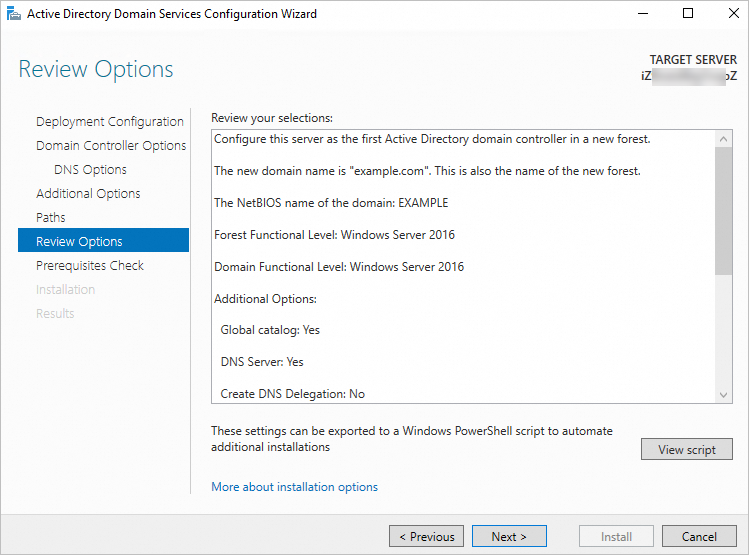
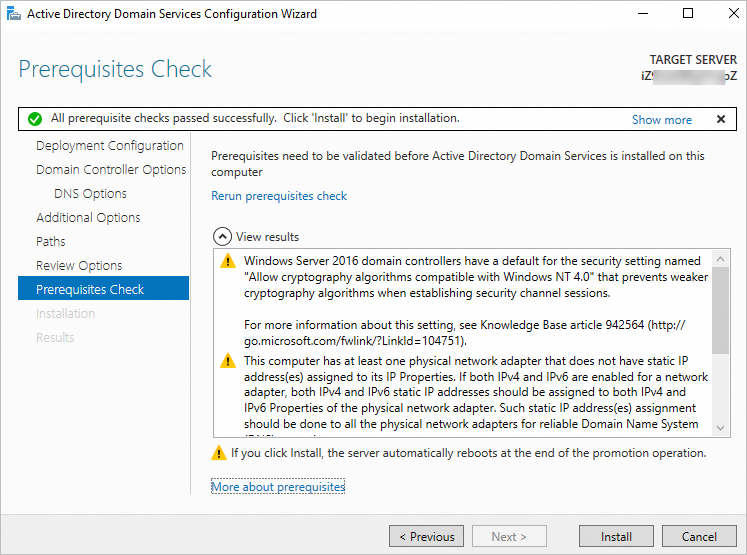
Confirm your configurations and click Next.
Confirm that the prerequisites validation is complete and click Install.
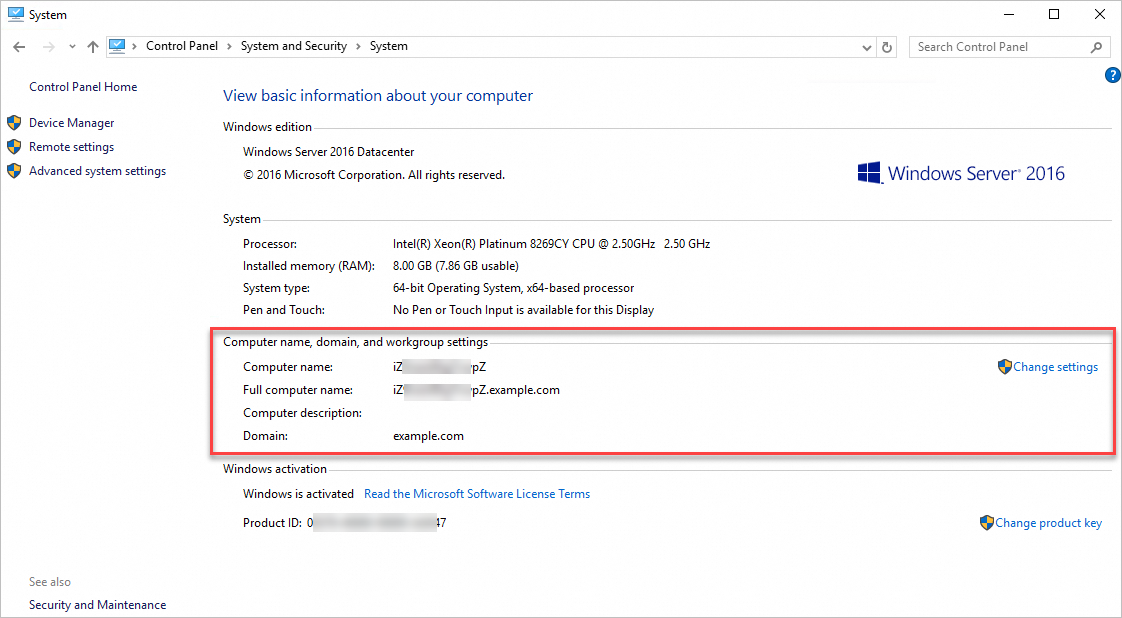
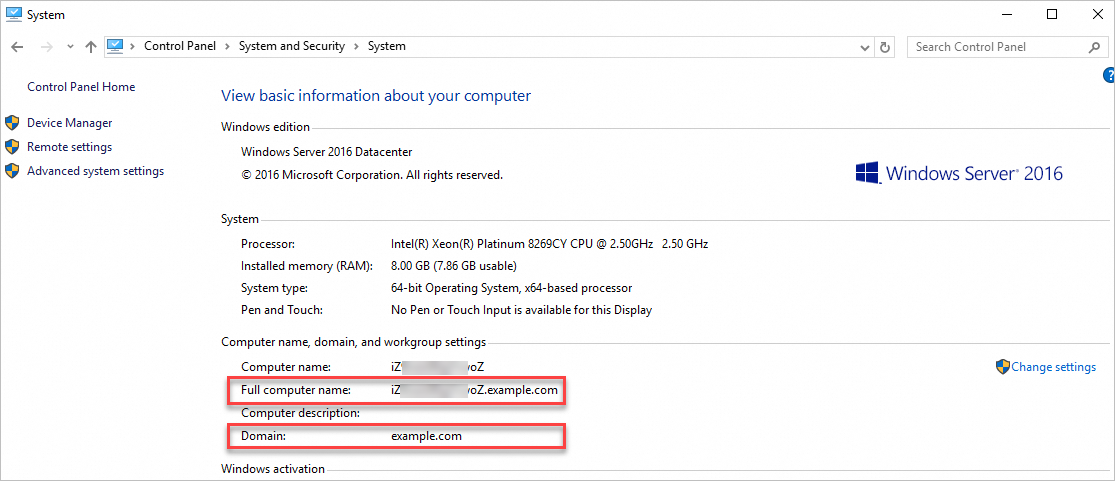
Wait for the items to be installed, restart the ECS instance, and then reconnect to the instance to check the installation results in the system configurations. If Active Directory Domain Services are installed, the domain controller information that you specified is displayed as shown in the following figure.
(Conditionally required) Step 2: Modify the SID of the ECS instance that is used as an AD domain client
If you deploy an AD domain controller by creating an ECS instance from a custom image that contains the settings of an AD domain controller, perform the following operations to modify the security identifier (SID) of the ECS instance that is used as an AD domain client. If you already modified the SID of the client, skip the steps that are described in this section.
Connect to the ECS instance that is used as an AD domain client.
For more information, see Connection method overview.
Download the PowerShell script that is used to modify the SID of the AD domain client.
Download link: AutoSysprep.ps1
Script source: Alibaba Cloud
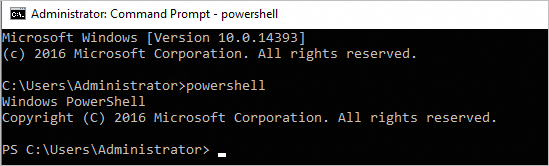
Open Command Prompt, and then enter
powershellto start a Windows PowerShell session.NoteIf the ECS instance runs a 64-bit operating system, do not use a 32-bit PowerShell (Windows PowerShell (x86)) script. Otherwise, an error occurs.
Go to the path in which the script is stored and run the following command to view the description of the script tool:
.\AutoSysprep.ps1 -help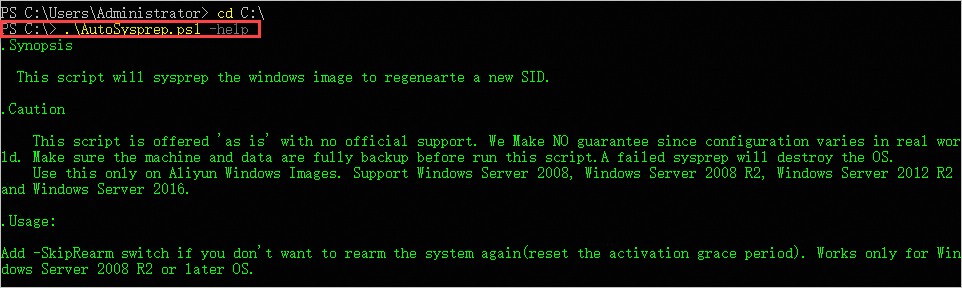
Run the following command to re-initialize the SID of the server:
.\AutoSysprep.ps1 -ReserveHostname -ReserveNetwork -SkipRearm -PostAction "reboot"
After you re-initialize the SID, the ECS instance that is used as an AD domain client automatically restarts. Take note of the following items:
The IP address of the ECS instance may change from a Dynamic Host Configuration Protocol (DHCP) IP address to a static IP address. Make sure that the IP address of the ECS instance remains unchanged before and after the instance restarts. Alternatively, you can set the IP address assignment type of the ECS instance to DHCP. This way, an IP address is automatically assigned based on DHCP as the primary private IP address to the instance in the ECS console.
ImportantDo not modify the primary private IP address of the ECS instance in the ECS console. Otherwise, access exceptions occur.
After you re-initialize the SID, the configurations of the firewall on the ECS instance are changed to the default configurations of Microsoft. As a result, the instance cannot be pinged. You must disable the Windows firewall for the Guest or public networks profile or open required ports. In the following figure, the Guest or public networks profile is in the Connected state, which indicates that the Windows firewall is enabled for the network profile.
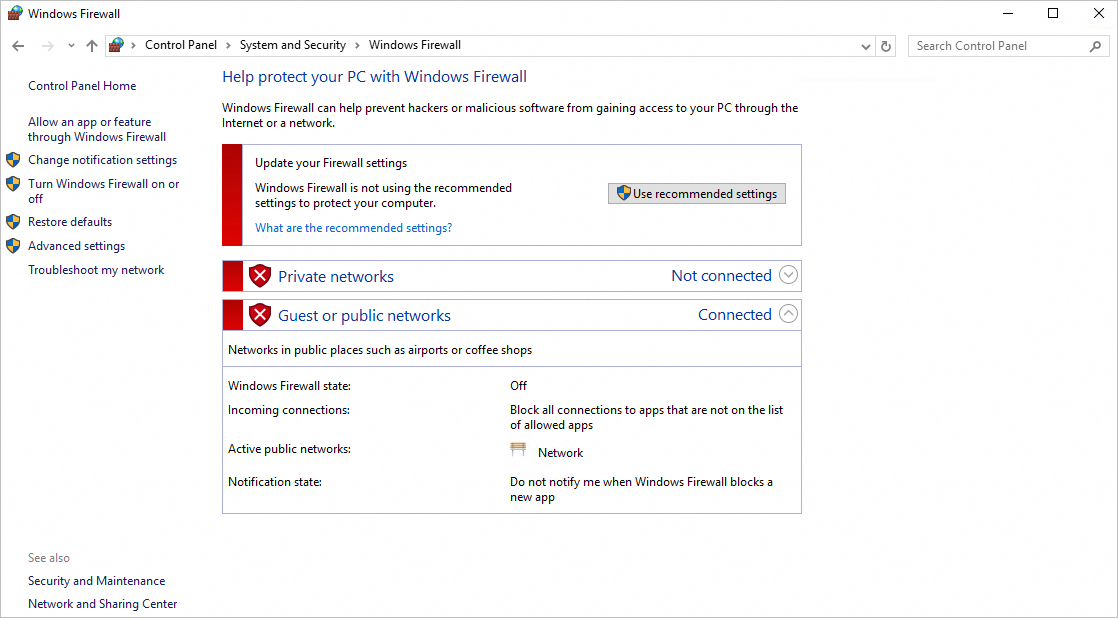
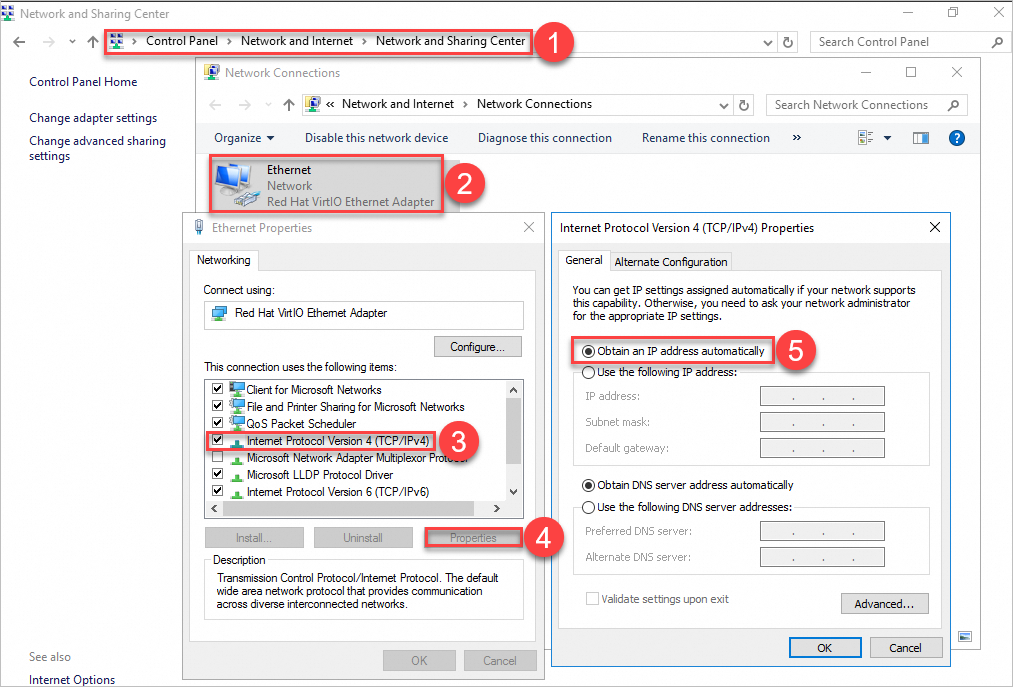
Disable the Windows firewall for the Guest or public networks profile in the Control Panel.
After you disable the Windows firewall for the Guest or public networks profile, the server can be pinged.
Step 3: Join the client to the AD domain
Connect to the ECS instance that is used as an AD domain client.
For more information, see Connection method overview.
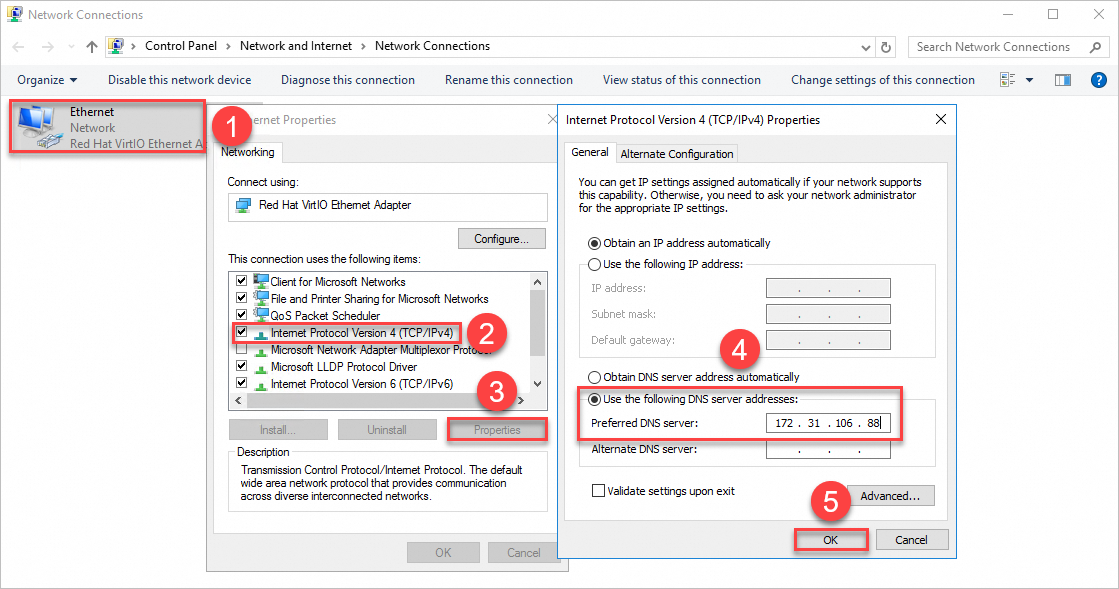
Modify the DNS server address.
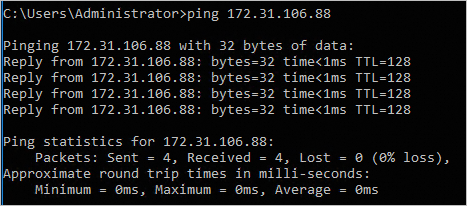
Change the DNS server address on the AD domain client to the IP address of the ECS instance on which the DNS server is deployed. For example, you deployed the AD domain controller and the DNS server on the same ECS instance whose IP address is 172.31.106.88 in Step 1: Deploy an AD domain controller. Specify 172.31.106.88 as the DNS server address.
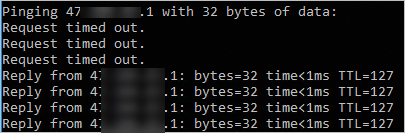
Check whether the IP address of the DNS server can be pinged.
The following command output that includes relevant parameters is displayed, which indicates that the DNS server can be pinged.
Join the AD domain client to the AD domain.
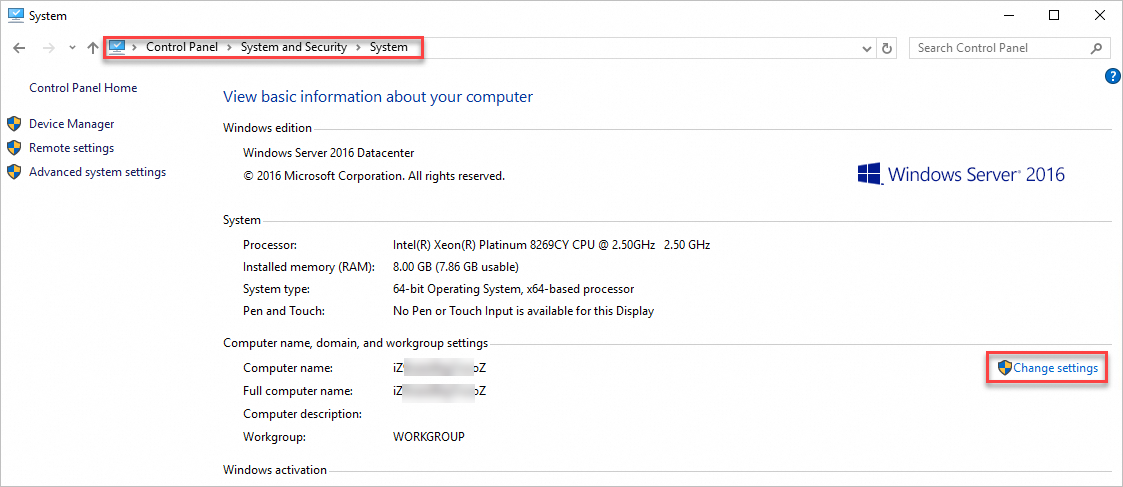
Go to the System page in the Control Panel.
In the lower-left corner of the desktop, click the
icon, enter control panelin the search box, and then select Control Panel in the search results.Choose .
In the upper-right corner of the Computer name, domain, and workgroup settings section click Change settings.
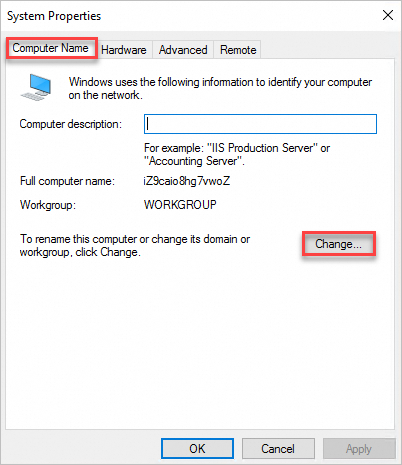
In the System Properties dialog box, click Change.
In the Computer Name/Domain Change dialog box, add the information about the AD domain.
You can change the computer name based on your business requirements. Enter the AD domain name that you specified in Step 1: Deploy an AD domain controller. In this example,
example.comis used as the AD domain name, as shown in the following figure.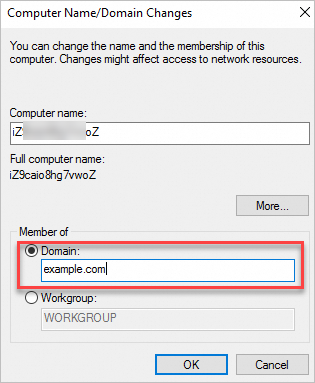
Restart the server for the changes to take effect.
NoteAfter you join the ECS instance that is used as a client to the AD domain, we recommend that you do not use the instance to create a custom image. Before you create a custom image from the ECS instance, we recommend that you remove the instance from the AD domain.
After you join the ECS instance that is used as a client to the AD domain, the AD domain name is displayed in the computer information of the instance.
Relevant operations
After you build an AD domain on an ECS instance and join another ECS instance as a client to the AD domain, you can perform operations based on your business requirements, such as creating users and groups. For more information, see Active Directory Domain Services Overview.